
Inscreed Cable System
The Warmup Inscreed Cable System can be covered with any flooring, and is excellent for installing within screeded floors of any size.
Application
All floor coverings
Embedded within screed
Large or small areas
Regular or irregular shaped areas
New construction
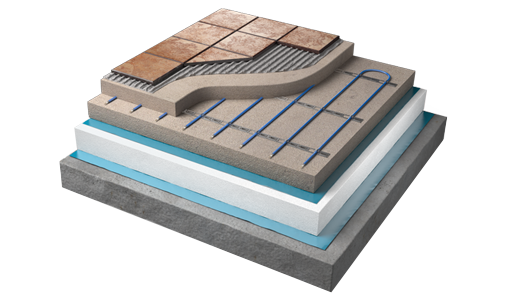
The Inscreed Cable System is designed for installation in concrete screed of 50mm to 100mm. If insulation is absent or beneath more than 100mm of concrete subfloor, insulation must be used to ensure optimum heat-up times. The system is designed for installation within screeded floors, and is ideal for new-build projects where floor height is not an issue. It is suitable for almost any flooring finish and ideal where the flooring (wood, carpet, vinyl) may be replaced from time to time.
The slower heat-up and cool-down time of the system makes it particularly suitable for rooms which are in constant use, as the screed can be used as a form of storage heating, making effective use of cheaper, low-tariff energy usage.

Key Benefits
Flooring can be changed periodically
Without damaging the heating cable, saving money and increasing flexibility.
Different wattage densities
The heating cable can be laid at different spacings to give different wattage output, depending on the insulation levels of the building and the client requirements.
Suitable under any floor finish
The system is covered by a minimum 30mm screed layer, thus on top any floor finish can be installed.
Guarantee & Warranty

SafetyNet Installation Guarantee
If you accidentally damage the heating system during installation, return it to Warmup and we will replace it with another system of the same make and model free of charge.

10 Years Warranty
This product comes with a 10 Year Warranty. We are completely confident in the standard of our products.
| Operating voltage | 220-230V AC, 50Hz |
| Cable thickness | 6mm |
| Inner Insulation | Advanced fluoropolymer |
| Outer Insulation | Polyolefin (PVC) |
| Output rating | 100 to 210W/m² |
| Cold tail length | 2.5m |
| Certificates |  |
| Model | Cable length (m) | Wattage (W) | Amperage (A) | Resistance (Ω) |
| WIS180 | 9,0 | 180 | 0,8 | 294 |
| WIS280 | 14,0 | 280 | 1,2 | 189 |
| WIS390 | 19,5 | 390 | 1,7 | 136 |
| WIS500 | 25,0 | 500 | 2,2 | 106 |
| WIS650 | 32,5 | 650 | 2,8 | 81 |
| WIS760 | 38,0 | 760 | 3,3 | 70 |
| WIS1000 | 50,0 | 1000 | 4,3 | 53 |
| WIS1200 | 60,0 | 1200 | 5,2 | 44 |
| WIS1460 | 73,0 | 1460 | 6,3 | 36 |
| WIS1550 | 77,5 | 1550 | 6,7 | 34 |
| WIS1770 | 88,5 | 1770 | 7,7 | 30 |
| WIS2070 | 103,5 | 2070 | 9,0 | 26 |
| WIS2600 | 130,0 | 2600 | 11,3 | 20 |
| WIS3140 | 157,0 | 3140 | 13,7 | 17 |
| WIS3370 | 168,5 | 3370 | 14,7 | 16 |
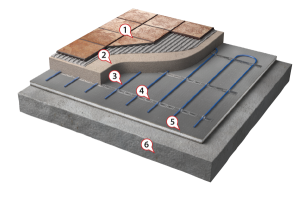
- Final floor
- Screed (50mm)
- Heating cable
- Metal fixing bands
- Insulation
- Subfloor
The WIS heating cable can be installed under any floor finish and was designed for installation within a minimum 50mm of screed. The system is versatile and can be installed at different wattage densities.
As a standard the system is installed between 100 and 130W/m² in large areas and between 130 and 150W/m² in small areas such as bathrooms. To be on the safe side a heat loss calculation should be made before deciding on the wattage density required.
To specify the required materials it is needed to determine the available floor area to heat. This area corresponds to the total area of the space minus the surface occupied by fixtures (such as kitchen units, toilet, bathtub, etc). The area to heat is equal to the surface where circulation is possible.
| Step 1: Measure room dimensions Work out the total floor area. If the overall room is rectangle in shape, for instance like in the image 4m by 2,7m, the total area is 4 x 2,7 = 10,8m². | 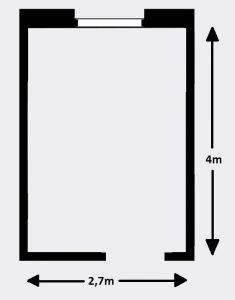 |
| Step 2: Disregard any area taken up by furniture Work out how much of the floor space is taken up by fixed objects. In the example shown the following fixtures can be measured as follows: Bathtub: 0,9 x 2,7 = 2,43m² Basin + Toilet: 1,5 x 0,8 = 1,2m² The total area occupied by fixtures is 3,63m² | 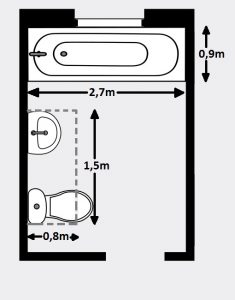 |
| Step 3: Determine the floor area to be heated The total floor area to be heated will be the total area minus the area occupied by fixtures: 10,8 – 3,63 = 7,17m². |  |
| Step 4: Select the heating cable size Assuming the wattage density required is 140W/m², first calculate the total wattage required for the room (area x wattage density): 7,17 x 140 = 1003,8W. This means the choice will fall on the 1000W cable (WIS1000), according to the heating cable dimensions table. To calculate the spacing between cables (spacing between cable loops) the following equation applies:[Area (m²) / Cable Length (m)] x 100 = Cable spacing (cm) In the given example it will be:[7,17 / 50] x 100 = 14,3cm | 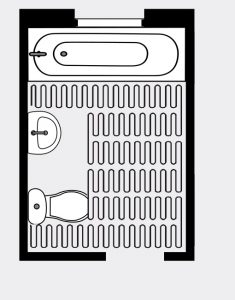 |
The system must be controlled via thermostat and we recommend the use floor insulation in order to improve savings and system performance. In new construction projects floor insulation is already existing, however if that is not the case, Warmup can supply insulation boards.
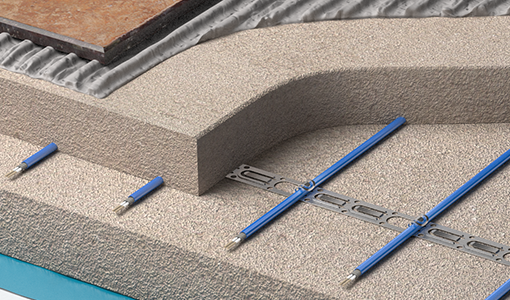
There are several different methods to fix the heating cable. If the method used includes the metal fixing bands, the amount of metal fixing bands rolls can be calculated as follows: cable length / 6 / 25. In the example given this would be 50 / 6 / 25 = 0,33, which has to be rounded to 1 roll.
Also needed

Thermostat
Choosing the correct control system is crucial in ensuring that the heating system works in the best possible way, efficiently and easily
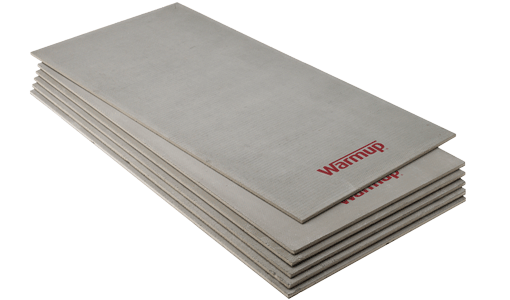
Insulation Boards
Using Insulation Boards with floor heating significantly reduces the heat-up times and running costs.
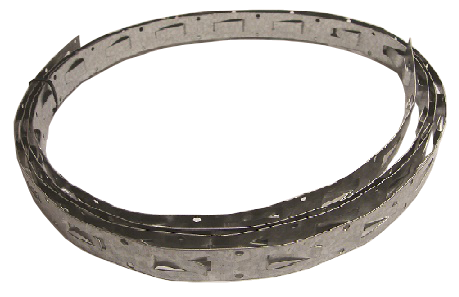
Metal Fixing Bands
Required to fix the WIS heating cable to the floor, prior to covering with screed.
Warmup Ireland
T: 1 800 937 429 (tech help)
CONNECT WITH WARMUP
![]()
![]()